In the last chapter, we saw how collections, such as lists and sets, can be used to do things that couldn’t be done easily with separate, individual variables.
In this chapter, we’re going to look at another kind of collection—a map, which can hold many associations between values.
Let’s check it out!
The Right Tool for the Job
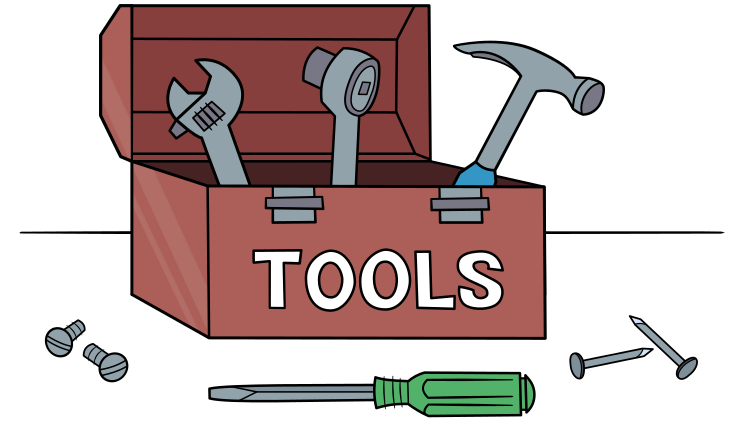
“You gotta use the right tool for the job.” That’s what Mr. Patchwell taught his young son, Jack, who was just starting to learn how to become a handyman like his old man. “When you’ve got a nail, you need to use a hammer, not a screwdriver.”
In order to help Jack pick out the right tool, he sketched out a table of the different hardware and tools in his toolbox.
“Now, with this table, you can easily look up what tool you need. Just scan down the left-hand column for the hardware you need to work with, and then scan across to see the right tool to use.”
Tables like this show that there are associations between things—a nail is associated with a hammer, a hex nut is associated with a wrench, and so on. In this chapter, we’ll build out Kotlin’s equivalent of a table like this, but before we do, let’s start by creating a single association.
Associating Data
One simple way to associate two values is to use a class called Pair. The constructor of this class has two parameters. You can call its constructor with any two objects, regardless of their types. In our case, let’s associate two String objects—one for a nail, and one for a hammer.
val association = Pair("Nail", "Hammer")
Pairis a very simple class that has two properties,firstandsecond, which you can use to get the values back out of it.To the right is a UML diagram showing the
Pairclass. The types offirstandseconddepend on the types of the arguments you give it when calling its constructor, so in this diagram, we will just useAandBas placeholders for the actual types.The
firstproperty will be whatever the first argument was when you called the constructor, and thesecondwill be whatever the second argument was.println(association.first) // Nail println(association.second) // HammerNow, instead of calling the constructor of the
Pairclass, it’s sometimes more natural to use a function namedto(), which will call thePairconstructor for you. This function can be called on any object at all. Let’s update our code so that it uses theto()function.val association = "Nail".to("Hammer")When reading this code, we could say, “When I have a
Nail, then I should gotoaHammer.” Both Listing 9.1 and Listing 9.3 do the same thing—they create aPairwhere the left-hand value is assigned to the property namedfirstand the right-hand value is assigned to the property namedsecond.The
to()function also has a special characteristic about it that lets us use it without the punctuation! So, we can also create this samePairlike this.val association = "Nail" to "Hammer"Notice that this is the same as Listing 9.3 above, except that the dot and both parentheses are missing. When a function can be called this way, it’s known as an infix function. We won’t see infix functions often, but it’s important to know that they exist so that they won’t confuse you when you see code like this.
So far, we’ve used type inference so that we don’t have to write out the type of the
associationvariable. As withListandSetin the previous chapter, the type of aPairvariable depends on the type of the things that it contains. Since both"Nail"and"Hammer"have typeString, the type of theassociationvariable isPair<String, String>.And of course, we can specify the type explicitly like this.
val association: Pair<String, String> = "Nail" to "Hammer"Now that we’ve successfully made a single association, we can do the same thing for the rest of the tools… and then put them all together into a map!
Map Fundamentals
Let’s look at Mr. Patchwell’s table again.
In Kotlin, a table like this is called a map. This might bring to mind maps like street maps and treasure maps, but that’s not what we’re talking about here.
The term comes from the world of mathematics, where a map defines a correspondence between elements of sets. Similarly, Kotlin maps define an association between each item in the left-hand column, and its corresponding item in the right-hand column.
Before we create our first map, let’s cover a few important terms. The items in the left-hand column of the table are called keys and the items in the right-hand column are called values.
The association of a key and a value within a map is called a map entry.
There’s an important rule to keep in mind—each key in a map is unique. However, the values can be duplicated. In other words, we cannot have duplicate items in the left-hand column, but it’s fine in the right-hand column. In the table below, notice that the left-hand column items are unique, but the wrench appears twice in the right-hand column.
Creating a Map with
mapOf()Now that we understand the main concepts, it’s time to create our first map! To do this, we’ll use the
mapOf()function, passing in aPairfor each association that we want in the map.val toolbox = mapOf( "Nail" to "Hammer", "Hex Nut" to "Wrench", "Hex Bolt" to "Wrench", "Slotted Screw" to "Slotted Screwdriver", "Phillips Screw" to "Phillips Screwdriver", )The
mapOf()function looks similar tolistOf()andsetOf()that we saw in the last chapter, except that all of the elements here have two pieces—the key and the value—which are joined together in aPair.We can see the similarities between the Kotlin map and Mr. Patchwell’s table when we place them side by side.
Just as with lists, sets, and other objects, we can use
println()to print out the contents of a map.println(toolbox)When we print this out, the entries of the map appear between braces. The keys are to the left of the equal signs, and the values are to the right.
{Nail=Hammer, Hex Nut=Wrench, Hex Bolt=Wrench, Slotted Screw=Slotted Screwdriver, Phillips Screw=Phillips Screwdriver}Just like with
Pair, the type of aMapvariable depends on the type of the key and the type of the value.So, we could write out the type explicitly like this.
val toolbox: Map<String, String> = mapOf( "Nail" to "Hammer", "Hex Nut" to "Wrench", "Hex Bolt" to "Wrench", "Slotted Screw" to "Slotted Screwdriver", "Phillips Screw" to "Phillips Screwdriver", )Looking Up a Value
The most common thing that we’ll need to do with a map is to look up a value. When Jack has a nail, for example, he needs to look up which tool to use. Just as Jack would find the nail in the left-hand column and find the corresponding tool next to it, Kotlin can give us a value when we provide it a key. We can use the
get()function to do this.val tool = toolbox.get("Nail") println(tool) // HammerSimilar to lists, we can also use the indexed access operator with maps to get a value.
val tool = toolbox["Nail"] println(tool) // HammerIf we call
get()(or use the indexed access operator) with a key that does not exist in the map, it will return anull. This means theget()function returns a nullable type rather than a non-nullable type! In Listing 9.9 and 9.10, it returns aString?rather than aString. We can use the null-safety tools that we learned about in Chapter 6 (such as the elvis operator) to get it back to a non-nullable type.Alternatively, we can call
getValue()instead ofget().getValue()will return a non-nullable type, but be warned—if you give it a key that does not exist, you’ll see an error message and your code will stop running.val tool = toolbox.getValue("Nail") println(tool) // Hammer val anotherTool = toolbox.getValue("Wing Nut") // Error at runtimeWe can also use
getOrDefault()to provide a default value if the key doesn’t exist. If Mr. Patchwell doesn’t have a tool for a particular piece of hardware, he’ll just need to tighten it by hand!val tool = toolbox.getOrDefault("Hanger Bolt", "Hand")Modifying a Map
As with the other collection types, maps come in two flavors of mutability—
MutableMapand an immutableMap. The mutable variety allows us to change its contents, whereas an immutable map requires us to create a new map instance that you can assign to a new or existing variable.Let’s look at how to change a
MutableMapfirst. To start with, we’ll need to usemutableMapOf()to create the map, instead of justmapOf(), which we used back in Listing 9.6.val toolbox = mutableMapOf( "Nail" to "Hammer", "Hex Nut" to "Wrench", "Hex Bolt" to "Wrench", "Slotted Screw" to "Slotted Screwdriver", "Phillips Screw" to "Phillips Screwdriver", )To add a new entry, we can use the
put()function, where the first argument is the key, and the second argument is the value.toolbox.put("Lumber", "Saw")Just like with the
get()function, though, Kotlin developers typically use the indexed access operator instead of calling theput()function directly. The following code accomplishes the same thing as Listing 9.14.toolbox["Lumber"] = "Saw"It’s also possible to change an existing value exactly the same way. Just provide a key that already exists.
toolbox["Hex Bolt"] = "Nut Driver"Finally, we can remove an entry using the
remove()function.toolbox.remove("Lumber")Note that although we can change a value, we cannot change a key. Instead, we have to remove a key and insert a new entry.
toolbox.remove("Phillips Screw") toolbox["Cross Recess Screw"] = "Phillips Screwdriver"Immutable Maps
As with immutable lists and sets, we can use the plus and minus operators on an immutable map. Remember, doing so will create new map instances, which would then typically be assigned to a variable.
The following code demonstrates the same operations as we did above, but on an immutable map.
var toolbox = mapOf( "Nail" to "Hammer", "Hex Nut" to "Wrench", "Hex Bolt" to "Wrench", "Slotted Screw" to "Slotted Screwdriver", "Phillips Screw" to "Phillips Screwdriver", ) // Add an entry toolbox = toolbox + Pair("Lumber", "Saw") // Update an entry toolbox = toolbox + Pair("Hex Bolt", "Nut Driver") // Remove an entry toolbox = toolbox - "Lumber" // Simulate changing a key toolbox = toolbox - "Phillips Screw" toolbox = toolbox + Pair("Cross Recess Screw", "Phillips Screwdriver")Map Operations
As with
ListandSet,Mapobjects have operations that can be performed on them, and some of them will look very familiar! Let’s start with theforEach()function.forEach()
The
forEach()function is almost identical to the one found onListandSetobjects. It takes a lambda that we can use to do something with each entry in the map. Since maps store entries, the parameter of the lambda will be of typeMap.Entry.1
Map.Entryis very similar to thePairclass that we looked at earlier in this chapter—it has two properties on it, but instead of being namedfirstandsecond, they’re namedkeyandvalue.Here’s how we can use the
forEach()function on aMap.toolbox.forEach { entry -> println("Use a ${entry.value} on a ${entry.key}") }When we run this code, here’s what we’ll see.
Use a Hammer on a Nail Use a Wrench on a Hex Nut Use a Wrench on a Hex Bolt Use a Slotted Screwdriver on a Slotted Screw Use a Phillips Screwdriver on a Phillips ScrewBecause it’s so similar to the
forEach()function that we saw in the last chapter, it should be easy to identify the main parts. Here they are.Filtering
Similar to lists and sets, we can
filtera map.Keep in mind that, just as we saw with lists, this function doesn’t modify an existing map—it creates a new map instance, so you’ll probably want to assign the result to a variable. Let’s filter down the toolbox to just screwdrivers.
val screwdrivers = toolbox.filter { entry -> entry.value.contains("Screwdriver") }The result is a new
Mapthat contains only the screwdrivers.In this case, we filtered on the
value, but it’s just as easy to filter by the keys.val screwdrivers = toolbox.filter { entry -> entry.key.contains("Screw") }Mapping
Yes, we can map a
Map! Simply use themapKeys()andmapValues()functions to convert its keys or values. Just like with the collection operations we looked at in the last chapter, it’s possible to create an operation chain. Let’s map both keys and values in one chain.val newToolbox = toolbox .mapKeys { entry -> entry.key.replace("Hex", "Flange") } .mapValues { entry -> entry.value.replace("Wrench", "Ratchet") }
Mapobjects have many other operations on them, which you can explore in Kotlin’s API docs. However, there’s one more operation that we’ll examine before continuing—withDefault().Setting Default Values
As we saw earlier, we can use
getOrDefault()to gracefully handle cases where the key does not exist. However, this can quickly get out of control if we use the same default every time!val tool = toolbox.getOrDefault("Hanger Bolt", "Hand") val another = toolbox.getOrDefault("Dowel Screw", "Hand") val oneMore = toolbox.getOrDefault("Eye Bolt", "Hand")Instead, we can use an operation named
withDefault(), which will return a new map based on the original. In this new map, whenever we callgetValue()with a key that doesn’t exist, it will invoke a lambda and return the result. Here’s how it looks.toolbox = toolbox.withDefault { key -> "Hand" }Now, instead of providing the default every time we try to get a value (as done in Listing 9.24 above), we can just call
getValue()normally.This is great, because if we ever want to change the default, we can make the change in one spot instead of many!
val tool = toolbox.getValue("Hanger Bolt") val anotherTool = toolbox.getValue("Dowel Screw") val oneMoreTool = toolbox.getValue("Eye Bolt")Keep in mind that this works with
getValue()but not withget()or the indexed access operator, which will continue to returnnullif the key is not found!Now you know how to create and change maps, get values out of them, and use collection operations on them. But things get really fun when maps are used in conjunction with other collections! Let’s look at that next.
Creating a Map from a List
We’ve created maps by hand using the
mapOf()function. It’s also possible to create maps that are based on existing list or set collections. With just a few important functions, we can slice and dice our data in many different ways! In order to do this, of course, we will need a list to start with.Instead of using a simple
Stringto represent the tools in Mr. Patchwell’s toolbox, let’s create a class, so that it can hold the name of the tool, its weight in ounces, and the corresponding hardware that it works with.class Tool( val name: String, val weightInOunces: Int, val hardware: String, )Now, let’s create a list of
Toolobjects, so that they include the tools from Mr. Patchwell’s toolbox.val tools = listOf( Tool("Hammer", 14, "Nail"), Tool("Wrench", 8, "Hex Nut"), Tool("Wrench", 8, "Hex Bolt"), Tool("Slotted Screwdriver", 5, "Slotted Screw"), Tool("Phillips Screwdriver", 5, "Phillips Screw"), )Now that we have a list, we’re ready to create some maps from it!
Associating Properties from a List of Objects
We can use the
associate()function to create a map from a list of objects. To start with, let’s useassociate()to create a map similar to the one in Listing 9.6.val toolbox = tools.associate { tool -> tool.hardware to tool.name }Hopefully you’re starting to feel more comfortable with collection operations at this point. For each element in the list, the
associate()function will invoke the lambda given to it. The lambda returns a key-valuePair, which contains the key and value that should be included in the resulting map.Here’s a breakdown of the
associate()function.And here’s the effect that it has in Listing 9.29.
Often, the number of elements in the resulting map will be the same as the number of elements in the original list. In some cases, it could have fewer. Because the keys in a map are all unique, if we try to add a key that already exists, it will overwrite the existing value.
For example, let’s reverse the key and value in the lambda in Listing 9.29, so that the tool
nameis the key, and thehardwareis the value.val toolbox = tools.associate { tool -> tool.name to tool.hardware }The original list has two
Toolobjects with anameof"Wrench", so whenassociate()encounters the first one, it’s added to the map, but when it encounters the second, it replaces the first value.So, the resulting map only includes
"Hex Bolt"rather than"Hex Nut", because of the two,"Hex Bolt"came last.So in this case, there are fewer entries in the map than elements in the original list. That is, there are only 4 entries in the map, compared with 5 elements in the list.
Other Association Functions
There are a few other variations of the
associate()function that are good to know. These are especially helpful when we want the original list element to be either the key or the value in the resulting map.For example, if we want to create a map where the keys are the tool names and the value is the
Toolobject, we can useassociateBy(). The lambda of this function returns just the key. The original list element itself will be the value.val toolsByName = tools.associateBy { tool -> tool.name }The effect of this function is shown in the following illustration.
With this map, we can easily get a tool by its name!
val hammer = toolsByName["Hammer"]Inversely, when we want to create a map where the keys are the
Toolobject and the value is specified in the lambda, we can use theassociateWith()function. The lambda of this function returns the value, and the original list element will be the key.val toolWeightInPounds = tools.associateWith { tool -> tool.weightInOunces * 0.0625 }To get the weight of a hammer, we’d need to have a hammer object already.
val hammerWeightInPounds = toolWeightInPounds[hammer]Grouping List Elements into a Map of Lists
Sometimes when you’ve got a list, you want to split it up into multiple smaller lists, based on some characteristic. For example, we can take the
toolslist and split it up by weight.To do this, we can use the
groupBy()function. This function will run the provided lambda for each element in the list.Elements for which the lambda returns the same result will be assembled into a list, and inserted into a map.
val toolsByWeight = tools.groupBy { tool -> tool.weightInOunces }The result is a
Mapwith one list of tools that weigh 14 ounces, another list of tools that weigh 8 ounces, and a third list of tools that weigh 5 ounces.The map’s key is the weight in ounces, and the map’s value is a list of tools that have that weight.
This illustration shows the effect that this operation has.
Here’s a breakdown of the
groupBy()function.In case you want something other than the original list element in the resulting lists, you can also call this function with a second argument. For that one, give it a lambda that returns whatever you want in the resulting list. For example, if you only want the names of the tools in those lists, you can do this:
val toolNamesByWeight = tools.groupBy( { tool -> tool.weightInOunces }, { tool -> tool.name } )Here’s the effect that this operation has.
Summary
Jack is well on his way to becoming a great handyman like his father, and with maps in your programming toolbox, you’re ready to bolt together some key-value pairs like a pro!
Here’s what you learned in this chapter:
- How to associate two values with a
Pair.- How to create a simple map with
mapOf()andmutableMapOf().- How to look up a value in a map by its key.
- How to modify a map.
- How to perform operations on a map.
- How to associate keys and values from an existing list of objects.
- How to group elements from an existing list of objects.
Well, we’ve learned a lot about collections over these past two chapters! Next, we’re going to explore some powerful concepts that make many of those collection operations possible. Get ready for receivers and extensions!
This type has a dot in the name because it’s a type that’s defined within another type—
Entryis defined within theMaptype. ↩︎Share this article: